Archive

Archive for the ‘PowerShell’ Category

One-Liner: Get Your Office 365 Tenant ID

November 8th, 2017 No comments

Office 365 logoThere are occasions that you’ll need your Office 365 tenant ID. The tenant ID is just a GUID assigned to your tenant. You can look it up in the Office 365 admin portal by peeking under Admin>Admin Centers>Azure AD>Azure Active Directory>Properties, and you’ll see the tenant ID in the ‘Directory ID’ field. That’s quite a few clicks, AND you have to log in to the Office 365 portal. Over time, there have been other places in the Office 365 portal where you can find it as well. All of them requiring a handful of clicks.

If you’re logged into your tenant via the SkypeOnlineConnector PowerShell module, you can use the following to get your tenant ID:

Get-CsTenant | Select-Object DisplayName, TenantID

Note, if you’re not logged in via the SkypeOnlineConnector, you can run the following first after installing the SkypeOnlineConnector:

Import-Module -Name SkypeOnlineConnector
$session = New-CsOnlineSession -Credential $(Get-Credential)
Import-PSSession -Session $session

Just like the portal method, this requires you to be logged in. There’s a similar method if you’re connected to Microsoft Azure Active Directory Module for Windows PowerShell using Get-MsolPartnerContract, but with the same limitations. You get the idea. But sometimes you just need the tenant ID without having to login to anything. Well, a PowerShell one-liner to the rescue! Just change the ‘mycompany.onmicrosoft.com’ to your Office 365 domain name in the line below and run it in PowerShell:

(Invoke-WebRequest -Uri 'https://login.windows.net/mycompany.onmicrosoft.com/.well-known/openid-configuration' | ConvertFrom-Json).authorization_endpoint.Split('/')[3]

If you look at that one-liner, you see that we’re merely invoking a web request to a specific URI, converting the Json format that it returns, and then grabbing a bit of the resulting Uri.

If you want it to be a little more flexible, we can adjust the code to prompt for a domain name, in case you want to use it in various scripts, as well as suppress the verbose output:

(Invoke-WebRequest -Uri "https://login.windows.net/$(Read-Host -Prompt 'enter domain name')/.well-known/openid-configuration" -Verbose:$false | ConvertFrom-Json).authorization_endpoint.Split('/')[3]

Of course, us consultant types can turn that into a function and toss it into our PowerShell profiles so that it’s always available. This method works with either your default onmicrosoft.com or your primary vanity domain name. I don’t have a tenant with multiple domain names to test with, but I surmise that it works the same.

While I had this post in draft, my buddy Tony Redmond (@12knocksinna) tweeted a link to an article that shows you how to retrieve the tenant ID using a web browser. From a web browser, you can also get the information by going to the same URL as determined above:

https://login.windows.net/mycompany.onmicrosoft.com/.well-known/openid-configuration

In the results, look for a line that begins with ‘authorization_endpoint’ (usually the first line), and you’ll see your tenant ID GUID in the URL on that line.

As you can see, there are multiple ways to get the tenant ID. Some require PowerShell, some don’t. Some require you to login, some don’t.


Function: Test-InvalidCerts – Ensuring Certificates Are In The Correct Certificate Store

March 17th, 2017 8 comments

I learned some very valuable lessons on my first Lync Server deployment. If Lync doesn’t work, it’s probably certificate related. That’s still the case with Skype for Business. Simple certificate issues can cause all kinds of problems. That’s why I’ve written about them in Lync Users Can’t Download Address Book if Certificate Uses CNG and One Liner: Add Trusted Root Cert Authorities to Edge Servers (among others). Today I again saw another issue around McAfee solutions and Front End services not starting (see An intermediate certificate is installed under “Trusted Root Certification Authorities” for more info). Turns out some certificates are in the wrong certificate store. An example would be an intermediate certificate improperly placed in the ‘Trusted Root Certification Authorities’. The solution is to just move the cert into the correct store. But rather than manually looking at each one, surely there is a way to check them all and move them to the right store! Well, Shirley (see what I did there?), there is.

Here is a simple function that checks both the intermediate and trusted root stores for certificates that should be in the opposite store. If it finds them, it will move them. Run this in an elevated PowerShell session.

function Test-InvalidCert {
  <#
  .SYNOPSIS
    Checks root and intermediate certificate stores for certificates in the wrong store & moves them to the correct store.

  .DESCRIPTION
    Checks root and intermediate certificate stores for certificates in the wrong store & moves them to the correct store. Certificates in the wrong store can be very problematic for Lync Server and Skype for Business Server.

  .NOTES
    Version               : 1.2
    Wish list             : 
    Rights Required       : Local administrator on server
    Sched Task Required   : No
    Lync/Skype4B Version  : N/A
    Author/Copyright      : © Pat Richard, Office Servers and Services (Skype for Business) MVP - All Rights Reserved
    Email/Blog/Twitter    : pat@innervation.com  https://ucunleashed.com  @patrichard
    Donations             : https://www.paypal.me/PatRichard
    Dedicated Post        : https://ucunleashed.com/3903
    Disclaimer            : You running this script means you won't blame author(s) if this breaks your stuff. This script is
                            provided AS IS without warranty of any kind. Author(s) disclaim all implied warranties including,
                            without limitation, any implied warranties of merchantability or of fitness for a particular
                            purpose. The entire risk arising out of the use or performance of the sample scripts and
                            documentation remains with you. In no event shall author(s) be liable for any damages whatsoever
                            (including, without limitation, damages for loss of business profits, business interruption,
                            loss of business information, or other pecuniary loss) arising out of the use of or inability
                            to use the script or documentation. Neither this script, nor any part of it other than those
                            parts that are explicitly copied from others, may be republished without author(s) express written 
                            permission.
    Acknowledgements      :
    Assumptions           : ExecutionPolicy of AllSigned (recommended), RemoteSigned, or Unrestricted (not recommended)
    Limitations           :
    Known issues          : None yet, but I'm sure you'll find some!

  .LINK
    
Function: Test-InvalidCerts – Ensuring Certificates Are In The Correct Certificate Store
.EXAMPLE .\Test-InvalidCerts.ps1 Description ----------- Checks root and intermediate store for certs in the wrong store & moves them to the proper store. .INPUTS None. You cannot pipe objects to this script. #> [CmdletBinding(SupportsPaging)] param( ) # end of param block process{ Write-Verbose -Message 'Checking for improper certs in root store' $InvalidCertsInRoot = Get-Childitem -Path cert:\LocalMachine\root -Recurse | Where-Object {$_.Issuer -ne $_.Subject} if ($InvalidCertsInRoot){ Write-Verbose -Message ('{0} invalid certificates detected in Root Certificate Store' -f $InvalidCertsInRoot.count) ForEach ($cert in $InvalidCertsInRoot){ Write-Verbose -Message ('Moving `"{0}`" to intermediate certificate store' -f $cert.subject) Move-Item -Path $cert.PSPath -Destination Cert:\LocalMachine\CA } }else{ Write-Verbose -Message 'No invalid certs found in Root Certificate Store' } $InvalidCertsInInt = Get-Childitem -Path cert:\LocalMachine\Ca -Recurse | Where-Object {$_.Issuer -eq $_.Subject} if ($InvalidCertsInInt){ Write-Verbose -Message ('{0} invalid certificates detected in Intermediate Certificate Store' -f $InvalidCertsInInt.count) ForEach ($cert in $InvalidCertsInInt){ Write-Verbose -Message ('Moving `"{0}`" to root certificate store' -f $cert.subject) Move-Item -Path $cert.PSPath -Destination Cert:\LocalMachine\Root } }else{ Write-Verbose -Message 'No invalid certs found in Intermediate Certificate Store' } } } # end function Test-InvalidCert

All output is verbose, so if you want to see what it’s doing, run the function with -Verbose.

Donations

I’ve never been one to really solicit donations for my work. My offerings are created because *I* need to solve a problem, and once I do, it makes sense to offer the results of my work to the public. I mean, let’s face it: I can’t be the only one with that particular issue, right? Quite often, to my surprise, I’m asked why I don’t have a “donate” button so people can donate a few bucks. I’ve never really put much thought into it. But those inquiries are coming more often now, so I’m yielding to them. If you’d like to donate, you can send a few bucks via PayPal at https://www.paypal.me/PatRichard. Money collected from that will go to the costs of my website (hosting and domain names), as well as to my home lab.

Categories: PowerShell Tags:

Using PowerShell to Add “Open PowerShell Here” and “Open Command Prompt Here” to Explorer Context Menus

February 17th, 2017 1 comment

Description

I recently reloaded my primary workstation. When I do that, I run my PowerShell profile file manually once, and it configures quite a few things, including dot sourcing that same file into the main profile file, which it also creates. When I was all done, I realized I didn’t have the “Open PowerShell Here” options when right clicking in Windows Explorer. Being old and forgetful, I did some searching and was quite surprised (and disappointed) that every method for setting this was either using an .inf file, a .reg file, or manually editing the registry. What a travesty that no one was showing how to do it via PowerShell. So a bottle of Mountain Dew Throwback and some Pink Floyd was all I needed.

The right-click options can be visible in three different places. The first is when you right-click a folder. Second is when you right-click a root drive. And the third is when you right-click the background in Explorer. The method I’ll be showing here will include setting the option for all three. Additionally, I’ll show how to add an option to open an elevated PowerShell session, as well as a command prompt. When finished, you’ll end up with something like this:

All options are configured in the HKEY_CLASSES_ROOT hive of the registry. The folder level option resides under \Directory\shell; the root drive option resides under \Drive\shell; and the Explorer background option resides under \Directory\Background\shell. For each, we create a new key with a unique name for each of the options (PowerShell, PowerShell elevated, cmd prompt), some values for the display text and icon, and a sub key with a value that shows what commands will run when executed. This is easily accomplished using the New-Item and New-ItemProperty cmdlets in an elevated PowerShell session.

Add “Open PowerShell Here”

#folders
New-Item -ItemType String -Path "Registry::HKEY_CLASSES_ROOT\Directory\shell\PowerShellHere" -Value "Open PowerShell Here" -Force | Out-Null
New-Item -ItemType String -Path "Registry::HKEY_CLASSES_ROOT\Directory\shell\PowerShellHere\command" -Value "$env:SystemRoot\system32\WindowsPowerShell\v1.0\powershell.exe -NoExit -Command Set-Location '%V'" -Force | Out-Null
New-ItemProperty -PropertyType String -Path "Registry::HKEY_CLASSES_ROOT\Directory\shell\PowerShellHere" -Name "Icon" -Value "$env:SystemRoot\system32\WindowsPowerShell\v1.0\powershell.exe" -Force | Out-Null
#background
New-Item -ItemType String -Path "Registry::HKEY_CLASSES_ROOT\Directory\Background\shell\PowerShellHere" -Value "Open PowerShell Here" -Force | Out-Null
New-Item -ItemType String -Path "Registry::HKEY_CLASSES_ROOT\Directory\Background\shell\PowerShellHere\command" -Value "$env:SystemRoot\system32\WindowsPowerShell\v1.0\powershell.exe -NoExit -Command Set-Location '%V'" -Force | Out-Null
New-ItemProperty -PropertyType String -Path "Registry::HKEY_CLASSES_ROOT\Directory\Background\shell\PowerShellHere" -Name "Icon" -Value "$env:SystemRoot\system32\WindowsPowerShell\v1.0\powershell.exe" -Force | Out-Null
#root drives
New-Item -ItemType String -Path "Registry::HKEY_CLASSES_ROOT\Drive\shell\PowerShellHere" -Value "Open PowerShell Here" -Force | Out-Null
New-Item -ItemType String -Path "Registry::HKEY_CLASSES_ROOT\Drive\shell\PowerShellHere\command" -Value "$env:SystemRoot\system32\WindowsPowerShell\v1.0\powershell.exe -NoExit -Command Set-Location '%V'" -Force | Out-Null
New-ItemProperty -PropertyType String -Path "Registry::HKEY_CLASSES_ROOT\Drive\shell\PowerShellHere" -Name "Icon" -Value "$env:SystemRoot\system32\WindowsPowerShell\v1.0\powershell.exe" -Force | Out-Null

Add “Open PowerShell Here (Admin)”

#folders
New-Item -ItemType String -Path "Registry::HKEY_CLASSES_ROOT\Directory\shell\PowerShellHereAdmin" -Value "Open PowerShell Here (Admin)" -Force | Out-Null
New-Item -ItemType String -Path "Registry::HKEY_CLASSES_ROOT\Directory\shell\PowerShellHereAdmin\command" -Value "PowerShell -Command `"Start-Process $env:SystemRoot\system32\WindowsPowerShell\v1.0\powershell.exe`" -verb runAs -ArgumentList '-NoExit','Set-Location','''%L'''" -Force | Out-Null
New-ItemProperty -PropertyType String -Path "Registry::HKEY_CLASSES_ROOT\Directory\shell\PowerShellHereAdmin" -Name "Icon" -Value "$env:SystemRoot\system32\WindowsPowerShell\v1.0\powershell.exe,1" -Force | Out-Null
#background
New-Item -ItemType String -Path "Registry::HKEY_CLASSES_ROOT\Directory\Background\shell\PowerShellHereAdmin" -Value "Open PowerShell Here (Admin)" -Force | Out-Null
New-Item -ItemType String -Path "Registry::HKEY_CLASSES_ROOT\Directory\Background\shell\PowerShellHereAdmin\command" -Value "PowerShell -Command `"Start-Process $env:SystemRoot\system32\WindowsPowerShell\v1.0\powershell.exe`" -verb runAs -ArgumentList '-NoExit','Set-Location','''%V'''" -Force | Out-Null
New-ItemProperty -PropertyType String -Path "Registry::HKEY_CLASSES_ROOT\Directory\Background\shell\PowerShellHereAdmin" -Name "Icon" -Value "$env:SystemRoot\system32\WindowsPowerShell\v1.0\powershell.exe,1" -Force | Out-Null
#root drives
New-Item -ItemType String -Path "Registry::HKEY_CLASSES_ROOT\Drive\shell\PowerShellHereAdmin" -Value "Open PowerShell Here (Admin)" -Force | Out-Null
New-Item -ItemType String -Path "Registry::HKEY_CLASSES_ROOT\Drive\shell\PowerShellHereAdmin\command" -Value "PowerShell -Command `"Start-Process $env:SystemRoot\system32\WindowsPowerShell\v1.0\powershell.exe`" -verb runAs -ArgumentList '-NoExit','Set-Location','''%L'''" -Force | Out-Null
New-ItemProperty -PropertyType String -Path "Registry::HKEY_CLASSES_ROOT\Drive\shell\PowerShellHereAdmin" -Name "Icon" -Value "$env:SystemRoot\system32\WindowsPowerShell\v1.0\powershell.exe,1" -Force | Out-Null

Add “Open Command Prompt Here”

#folders
New-Item -Path "Registry::HKEY_CLASSES_ROOT\Directory\shell\CmdHere" -Value "Open Command Prompt Here" -ItemType string -Force | Out-Null
New-Item -Path "Registry::HKEY_CLASSES_ROOT\Directory\shell\CmdHere\command" -Value 'cmd.exe /k pushd %L' -ItemType string -Force | Out-Null
New-ItemProperty -Path "Registry::HKEY_CLASSES_ROOT\Directory\shell\CmdHere" -Name "Icon" -Value "C:\Windows\System32\cmd.exe,0" -Type string -Force | Out-Null
#background
New-Item -Path "Registry::HKEY_CLASSES_ROOT\Directory\Background\shell\CmdHere" -Value "Open Command Prompt Here" -ItemType string -Force | Out-Null
New-Item -Path "Registry::HKEY_CLASSES_ROOT\Directory\Background\shell\CmdHere\command" -Value 'cmd.exe /k pushd %L' -ItemType string -Force | Out-Null
New-ItemProperty -Path "Registry::HKEY_CLASSES_ROOT\Directory\Background\shell\CmdHere" -Name "Icon" -Value "C:\Windows\System32\cmd.exe,0" -Type string -Force | Out-Null
#root drives
New-Item -Path "Registry::HKEY_CLASSES_ROOT\Drive\shell\CmdHere" -Value "Open Command Prompt Here" -ItemType string -Force | Out-Null
New-Item -Path "Registry::HKEY_CLASSES_ROOT\Drive\shell\CmdHere\command" -Value 'cmd.exe /k pushd %L' -ItemType string -Force | Out-Null
New-ItemProperty -Path "Registry::HKEY_CLASSES_ROOT\Drive\shell\CmdHere" -Name "Icon" -Value "C:\Windows\System32\cmd.exe,0" -Type string -Force | Out-Null

Now we can put that all together, and add some checks to ensure the settings are not already configured, to avoid errors.

# folders
if(-not (Test-Path -Path "Registry::HKEY_CLASSES_ROOT\Directory\shell\PowerShellHere")){
    New-Item -ItemType String -Path "Registry::HKEY_CLASSES_ROOT\Directory\shell\PowerShellHere" -Value "Open PowerShell Here" -Force | Out-Null
    New-Item -ItemType String -Path "Registry::HKEY_CLASSES_ROOT\Directory\shell\PowerShellHere\command" -Value "$env:SystemRoot\system32\WindowsPowerShell\v1.0\powershell.exe -NoExit -Command Set-Location '%V'" -Force | Out-Null
    New-ItemProperty -PropertyType String -Path "Registry::HKEY_CLASSES_ROOT\Directory\shell\PowerShellHere" -Name "Icon" -Value "$env:SystemRoot\system32\WindowsPowerShell\v1.0\powershell.exe" -Force | Out-Null
}
if(-not (Test-Path -Path "Registry::HKEY_CLASSES_ROOT\Directory\shell\PowerShellHereAdmin")){
    New-Item -ItemType String -Path "Registry::HKEY_CLASSES_ROOT\Directory\shell\PowerShellHereAdmin" -Value "Open PowerShell Here (Admin)" -Force | Out-Null
    New-Item -ItemType String -Path "Registry::HKEY_CLASSES_ROOT\Directory\shell\PowerShellHereAdmin\command" -Value "PowerShell -Command `"Start-Process $env:SystemRoot\system32\WindowsPowerShell\v1.0\powershell.exe`" -verb runAs -ArgumentList '-NoExit','cd','%V'" -Force | Out-Null
    New-ItemProperty -PropertyType String -Path "Registry::HKEY_CLASSES_ROOT\Directory\shell\PowerShellHereAdmin" -Name "Icon" -Value "$env:SystemRoot\system32\WindowsPowerShell\v1.0\powershell.exe,1" -Force | Out-Null
}
if(-not (Test-Path -Path "Registry::HKEY_CLASSES_ROOT\Directory\shell\CmdHere")){
    New-Item -Path "Registry::HKEY_CLASSES_ROOT\Directory\shell\CmdHere" -Value "Open Command Prompt Here" -ItemType string -Force | Out-Null
    New-Item -Path "Registry::HKEY_CLASSES_ROOT\Directory\shell\CmdHere\command" -Value 'cmd.exe /k pushd %L' -ItemType string -Force | Out-Null
    New-ItemProperty -Path "Registry::HKEY_CLASSES_ROOT\Directory\shell\CmdHere" -Name "Icon" -Value "C:\Windows\System32\cmd.exe,0" -Type string -Force | Out-Null
}

# Explorer background
if(-not (Test-Path -Path "Registry::HKEY_CLASSES_ROOT\Directory\Background\shell\PowerShellHere")){
    New-Item -ItemType String -Path "Registry::HKEY_CLASSES_ROOT\Directory\Background\shell\PowerShellHere" -Value "Open PowerShell Here" -Force | Out-Null
    New-Item -ItemType String -Path "Registry::HKEY_CLASSES_ROOT\Directory\Background\shell\PowerShellHere\command" -Value "$env:SystemRoot\system32\WindowsPowerShell\v1.0\powershell.exe -NoExit -Command Set-Location '%V'" -Force | Out-Null
    New-ItemProperty -PropertyType String -Path "Registry::HKEY_CLASSES_ROOT\Directory\Background\shell\PowerShellHere" -Name "Icon" -Value "$env:SystemRoot\system32\WindowsPowerShell\v1.0\powershell.exe" -Force | Out-Null
}
if(-not (Test-Path -Path "Registry::HKEY_CLASSES_ROOT\Directory\Background\shell\PowerShellHereAdmin")){
    New-Item -ItemType String -Path "Registry::HKEY_CLASSES_ROOT\Directory\Background\shell\PowerShellHereAdmin" -Value "Open PowerShell Here (Admin)" -Force | Out-Null
    New-Item -ItemType String -Path "Registry::HKEY_CLASSES_ROOT\Directory\Background\shell\PowerShellHereAdmin\command" -Value "PowerShell -Command `"Start-Process $env:SystemRoot\system32\WindowsPowerShell\v1.0\powershell.exe`" -verb runAs -ArgumentList '-NoExit','cd','%V'" -Force | Out-Null
    New-ItemProperty -PropertyType String -Path "Registry::HKEY_CLASSES_ROOT\Directory\Background\shell\PowerShellHereAdmin" -Name "Icon" -Value "$env:SystemRoot\system32\WindowsPowerShell\v1.0\powershell.exe,1" -Force | Out-Null
}
if(-not (Test-Path -Path "Registry::HKEY_CLASSES_ROOT\Directory\Background\shell\CmdHere")){
    New-Item -Path "Registry::HKEY_CLASSES_ROOT\Directory\Background\shell\CmdHere" -Value "Open Command Prompt Here" -ItemType string -Force | Out-Null
    New-Item -Path "Registry::HKEY_CLASSES_ROOT\Directory\Background\shell\CmdHere\command" -Value 'cmd.exe /k pushd %L' -ItemType string -Force | Out-Null
    New-ItemProperty -Path "Registry::HKEY_CLASSES_ROOT\Directory\Background\shell\CmdHere" -Name "Icon" -Value "C:\Windows\System32\cmd.exe,0" -Type string -Force | Out-Null
}

# root drives
if(-not (Test-Path -Path "Registry::HKEY_CLASSES_ROOT\Drive\shell\PowerShellHere")){
    New-Item -ItemType String -Path "Registry::HKEY_CLASSES_ROOT\Drive\shell\PowerShellHere" -Value "Open PowerShell Here" -Force | Out-Null
    New-Item -ItemType String -Path "Registry::HKEY_CLASSES_ROOT\Drive\shell\PowerShellHere\command" -Value "$env:SystemRoot\system32\WindowsPowerShell\v1.0\powershell.exe -NoExit -Command Set-Location '%V'" -Force | Out-Null
    New-ItemProperty -PropertyType String -Path "Registry::HKEY_CLASSES_ROOT\Drive\shell\PowerShellHere" -Name "Icon" -Value "$env:SystemRoot\system32\WindowsPowerShell\v1.0\powershell.exe" -Force | Out-Null
}
if(-not (Test-Path -Path "Registry::HKEY_CLASSES_ROOT\Drive\shell\PowerShellHereAdmin")){
    New-Item -ItemType String -Path "Registry::HKEY_CLASSES_ROOT\Drive\shell\PowerShellHereAdmin" -Value "Open PowerShell Here (Admin)" -Force | Out-Null
    New-Item -ItemType String -Path "Registry::HKEY_CLASSES_ROOT\Drive\shell\PowerShellHereAdmin\command" -Value "PowerShell -Command `"Start-Process $env:SystemRoot\system32\WindowsPowerShell\v1.0\powershell.exe`" -verb runAs -ArgumentList '-NoExit','cd','%V'" -Force | Out-Null
    New-ItemProperty -PropertyType String -Path "Registry::HKEY_CLASSES_ROOT\Drive\shell\PowerShellHereAdmin" -Name "Icon" -Value "$env:SystemRoot\system32\WindowsPowerShell\v1.0\powershell.exe,1" -Force | Out-Null
}
if(-not (Test-Path -Path "Registry::HKEY_CLASSES_ROOT\Drive\shell\CmdHere")){
    New-Item -Path "Registry::HKEY_CLASSES_ROOT\Drive\shell\CmdHere" -Value "Open Command Prompt Here" -ItemType string -Force | Out-Null
    New-Item -Path "Registry::HKEY_CLASSES_ROOT\Drive\shell\CmdHere\command" -Value 'cmd.exe /k pushd %L' -ItemType string -Force | Out-Null
    New-ItemProperty -Path "Registry::HKEY_CLASSES_ROOT\Drive\shell\CmdHere" -Name "Icon" -Value "C:\Windows\System32\cmd.exe,0" -Type string -Force | Out-Null
}

Since the file that’s dot sourced in my PowerShell profile is shared among all of my machines, I tossed the above code in it to ensure that all machines are configured this way, and to ensure that if I reload one of them, it gets reconfigured with no additional work.

Moving to sub-menu

If your right-click menu is already full of other options, and you’d rather have them on a menu when you hit SHIFT+Right Click, that’s easy. We add a property called “extended”, with an empty value, to the key for each option. We can do them all at once using this code (after running the above code first):

#folders
if(-Not (Get-ItemProperty -Path "Registry::HKEY_CLASSES_ROOT\Directory\shell\PowerShellHere" -Name "extended")){
    New-ItemProperty -PropertyType String -Path "Registry::HKEY_CLASSES_ROOT\Directory\shell\PowerShellHere" -Name "extended" -Value $null | Out-Null
}
if(-Not (Get-ItemProperty -Path "Registry::HKEY_CLASSES_ROOT\Directory\shell\PowerShellHereAdmin" -Name "extended")){
    New-ItemProperty -PropertyType String -Path "Registry::HKEY_CLASSES_ROOT\Directory\shell\PowerShellHereAdmin" -Name "extended" -Value $null | Out-Null
}
if(-Not (Get-ItemProperty -Path "Registry::HKEY_CLASSES_ROOT\Directory\shell\CmdPromptHere" -Name "extended")){
    New-ItemProperty -PropertyType String -Path "Registry::HKEY_CLASSES_ROOT\Directory\shell\CmdPromptHere" -Name "extended" -Value $null | Out-Null
}

#background
if(-Not (Get-ItemProperty -Path "Registry::HKEY_CLASSES_ROOT\Directory\Background\shell\PowerShellHere" -Name "extended")){
    New-ItemProperty -PropertyType String -Path "Registry::HKEY_CLASSES_ROOT\Directory\Background\shell\PowerShellHere" -Name "extended" -Value $null | Out-Null
}
if(-Not (Get-ItemProperty -Path "Registry::HKEY_CLASSES_ROOT\Directory\Background\shell\PowerShellHereAdmin" -Name "extended")){
    New-ItemProperty -PropertyType String -Path "Registry::HKEY_CLASSES_ROOT\Directory\Background\shell\PowerShellHereAdmin" -Name "extended" -Value $null | Out-Null
}
if(-Not (Get-ItemProperty -Path "Registry::HKEY_CLASSES_ROOT\Directory\Background\shell\CmdPromptHere" -Name "extended")){
    New-ItemProperty -PropertyType String -Path "Registry::HKEY_CLASSES_ROOT\Directory\Background\shell\CmdPromptHere" -Name "extended" -Value $null | Out-Null
}

#root drives
if(-Not (Get-ItemProperty -Path "Registry::HKEY_CLASSES_ROOT\Drive\shell\PowerShellHere" -Name "extended")){
    New-ItemProperty -PropertyType String -Path "Registry::HKEY_CLASSES_ROOT\Drive\shell\PowerShellHere" -Name "extended" -Value $null | Out-Null
}
if(-Not (Get-ItemProperty -Path "Registry::HKEY_CLASSES_ROOT\Drive\shell\PowerShellHereAdmin" -Name "extended")){
    New-ItemProperty -PropertyType String -Path "Registry::HKEY_CLASSES_ROOT\Drive\shell\PowerShellHereAdmin" -Name "extended" -Value $null | Out-Null
}
if(-Not (Get-ItemProperty -Path "Registry::HKEY_CLASSES_ROOT\Drive\shell\CmdPromptHere" -Name "extended")){
    New-ItemProperty -PropertyType String -Path "Registry::HKEY_CLASSES_ROOT\Drive\shell\CmdPromptHere" -Name "extended" -Value $null | Out-Null
}

Removing the options

If you decide you’re not a fan of the options, removing them is really easy using the Remove-Item cmdlet.

#folders
if(Test-Path -Path "Registry::HKEY_CLASSES_ROOT\Directory\shell\PowerShellHere"){
    Remove-Item -Path "Registry::HKEY_CLASSES_ROOT\Directory\shell\PowerShellHere" -Recurse -Confirm:$False
}
if(Test-Path -Path "Registry::HKEY_CLASSES_ROOT\Directory\shell\PowerShellHereAdmin"){
    Remove-Item -Path "Registry::HKEY_CLASSES_ROOT\Directory\shell\PowerShellHereAdmin" -Recurse -Confirm:$False
}
if(Test-Path -Path "Registry::HKEY_CLASSES_ROOT\Directory\shell\CmdPromptHere"){
    Remove-Item -Path "Registry::HKEY_CLASSES_ROOT\Directory\shell\CmdPromptHere" -Recurse -Confirm:$False
}

#background
if(Test-Path -Path "Registry::HKEY_CLASSES_ROOT\Directory\Background\shell\PowerShellHere"){
    Remove-Item -Path "Registry::HKEY_CLASSES_ROOT\Directory\Background\shell\PowerShellHere" -Recurse -Confirm:$False
}
if(Test-Path -Path "Registry::HKEY_CLASSES_ROOT\Directory\Background\shell\PowerShellHereAdmin"){
    Remove-Item -Path "Registry::HKEY_CLASSES_ROOT\Directory\Background\shell\PowerShellHereAdmin" -Recurse -Confirm:$False
}
if(Test-Path -Path "Registry::HKEY_CLASSES_ROOT\Directory\Background\shell\CmdPromptHere"){
    Remove-Item -Path "Registry::HKEY_CLASSES_ROOT\Directory\Background\shell\CmdPromptHere" -Recurse -Confirm:$False
}

#root drives
if(Test-Path -Path "Registry::HKEY_CLASSES_ROOT\Drive\shell\PowerShellHere"){
    Remove-Item -Path "Registry::HKEY_CLASSES_ROOT\Drive\shell\PowerShellHere" -Recurse -Confirm:$False
}
if(Test-Path -Path "Registry::HKEY_CLASSES_ROOT\Drive\shell\PowerShellHereAdmin"){
    Remove-Item -Path "Registry::HKEY_CLASSES_ROOT\Drive\shell\PowerShellHereAdmin" -Recurse -Confirm:$False
}
if(Test-Path -Path "Registry::HKEY_CLASSES_ROOT\Drive\shell\CmdPromptHere"){
    Remove-Item -Path "Registry::HKEY_CLASSES_ROOT\Drive\shell\CmdPromptHere" -Recurse -Confirm:$False
}

Donations

I’ve never been one to really solicit donations for my work. My offerings are created because *I* need to solve a problem, and once I do, it makes sense to offer the results of my work to the public. I mean, let’s face it: I can’t be the only one with that particular issue, right? Quite often, to my surprise, I’m asked why I don’t have a “donate” button so people can donate a few bucks. I’ve never really put much thought into it. But those inquiries are coming more often now, so I’m yielding to them. If you’d like to donate, you can send a few bucks via PayPal at https://www.paypal.me/PatRichard. Money collected from that will go to the costs of my website (hosting and domain names), as well as to my home lab.


Categories: PowerShell Tags:

PowerShell Default Parameter Values – Time to Tweak Your Profile Again!

January 18th, 2017 No comments

One of the great things about a PowerShell profile is you get to customize the environment. One nice feature to accomplish this is the ability to set default parameter values for cmdlets. A great write-up about this is available at About Parameters Default Values. You can see similar info by running get-help about_Parameters_Default_Values. I’m not going to go into great detail about the feature, as those two resources are more than sufficient. What I am going to list here are some great examples that I’ve come to love. They are all in my profile.

This first example if my favorite. When you use the Get-Help cmdlet, the resulting info is shown in a popup window. This is great as I can keep it open while I work on my code in the main console window.

$PsDefaultParameterValues.add("Get-Help:ShowWindow",$True)

If you’re an OCD type like me, you want output of commands to be formatted and everything to line up. This example defaults the Format-Table cmdlet to autosize its output.

$PsDefaultParameterValues.add("Format-Table:AutoSize",$True)

We can actually set this behavior for both Format-Wide and Format-Table at the same time (courtesy of TechNet):

$PSDefaultParameterValues.add("Format-[wt]*:Autosize",$True)

How about we capture the output of the last PowerShell command into a variable, such as $0 (courtesy of TechNet):

$PSDefaultParameterValues.add("Out-Default:OutVariable",“0”)

If you can’t tell by my other articles and scripts here, I spend a lot of time writing scripts to help in deployments, migrations, etc. When you’re getting or setting data in Active Directory, the last thing you want is for replication (intersite or intrasite) to be an issue. So, when possible, you specify a specific domain controller to send all of your commands together. This example comes from serverfault:

$PSDefaultParameterValues = @{"*-AD*:Server"='YOUR-CHOSEN-DC'}

Now that’s not completely perfect, as it would have a hard coded DC name. And just our luck, it will be migrated out of existence and then our stuff breaks. So, let’s set a default parameter value with the result of a PowerShell query. In this case, a DC in the same site for each of our Lync/Skype for Business cmdlets that support the Server parameter:

$PSDefaultParameterValues.add("*-Cs*:Server",(Get-ADDomainController -Discover -NextClosestSite))

Or maybe you want to specify the PDC emulator instead? (courtesy Tommy Maynard)

$PSDefaultParameterValues.Add("Get-ADPrincipalGroupMembership:Server",$((Get-ADDomain).PDCEmulator))

Or, we can use a variable. Let’s say we assign $DC to a DC in the same site, and then use that going forward:

$dc = Get-ADDomainController -Discover -NextClosestSite
$PSDefaultParameterValues.add("*-AD*:Server","$dc")
$PSDefaultParameterValues.add("*-Cs*:Server","$dc")

Now, how many times do you get the “Are you sure” prompt? Force the command instead of getting prompted!

$PSDefaultParameterValues['*:Force']= $true

Fellow MVP Boe Prox also has a great list of examples on his post Using $PSDefaultParameterValues in PowerShell. Check it out!

Now, you can list each of these, or any combination, in your profile, each on a separate line. Or, we can use an array to set all at one time:

$PSDefaultParameterValues=@{
'Format-Table:AutoSize'=$True;
'Get-Help:ShowWindow'=$True;
'Send-MailMessage:SmtpServer'=$smtpserver
}

Something to keep an eye on here. In previous examples, I was using the $PSDefaultParameterValues.add method which ADDS the value to the existing list. If you omit the “.add” and instead use “=” or “=@{}”, you are replacing all existing values with what you specify. Additionally, you can use the $PSDefaultParameterValues.remove method to remove specific parameter values and keep any remaining values. An example of removing a single default parameter value:

$PsDefaultParameterValues.remove("Get-Help:ShowWindow",$True)

Are all of these changes permanent? No. They are valid for the life of the PowerShell session. If you need to remove them mid-session, you can clear them using:

$PsDefaultParameterValues.clear()

Defining default parameter values can also be defined at various scopes, as well, including Global, Script, etc. See Get-Help about_Scope for more info.

I mentioned at the beginning that these are great in your profile. Well, they’re great in your scripts as well. They allow for global changes instead of going through a script and updating each call to a cmdlet. By all means, send me your favorites. We’ll build a big list!

Categories: PowerShell Tags: ,

Function: Remove-IisLogFile – Purging Old IIS Log Files with PowerShell

November 21st, 2016 1 comment

PowerShell-logo-128x84If you’re not careful, your server running IIS can create a LOT of logs. The default location for logs is in a sub-folder for the specific web site in c:\inetpub\logs\logfiles\. You can imagine the problems that will happen when your OS drive fills up with logs… things tend to not go so well, and the phone starts to ring. We can’t really just disable logging, as log files are an invaluable resource used in troubleshooting, planning, and maintenance.

Ryan over at Ryadel wrote a great article on adjusting the logging for IIS to be a little more helpful, and to minimize bloat. But we still need to watch for the accumulation of logs and the disk space they take. Ryan includes a two-line method of cleaning up the files in a single IIS site. But some servers, such as Lync and Skype for Business front end servers, have multiple web sites defined. I’ve taken Ryan’s method a bit further by incorporating an idea presented in a Stack Overflow thread, tweaked it a bit, and now we have some code that will clean up all log files that are older than 180 days for all websites on a server. Obviously, that time frame can be adjusted. Here it is the simple method:

Import-Module WebAdministration
$start = (Get-Date).AddDays(-180) 
foreach($WebSite in $(Get-WebSite)) {
  $logFile = "$($Website.logFile.directory)\w3svc$($website.id)".replace("%SystemDrive%",$env:SystemDrive)
  if (Test-Path $logfile){
    Get-ChildItem -Path "$logFile\*.log" | Where-Object {$PSItem.LastWriteTime -lt $start} | Remove-Item -Force
    # Write-Output "$($WebSite.name) [$logfile]"
  }
}

By adjusting the number at the end of the second line, we tailor the maximum age of the logs. In the above example, we’re keeping 180 days of them. We could put that code into a script and call it with a scheduled task to automate the cleanup, essentially creating a self-cleaning server. We can also wrap that code into a function and toss it into the PowerShell profile on the web server, allowing us to run it whenever we need to:

function Remove-IisLogFile{
    [CmdletBinding()]
    param(
        [Parameter(ValueFromPipeline, ValueFromPipelineByPropertyName)]
        [int] $age = 180
    )
    Import-Module WebAdministration
    $start = (Get-Date).AddDays(-$age) 
    foreach($WebSite in $(Get-WebSite)) {
      $logFile = "$($Website.logFile.directory)\w3svc$($website.id)".replace("%SystemDrive%",$env:SystemDrive)
      if (Test-Path $logfile){
        Get-ChildItem -Path "$logFile\*.log" | Where-Object {$PSItem.LastWriteTime -lt $start} | Remove-Item
        # Get-ChildItem -Path "$logFile\*.log" | Where-Object {$PSItem.LastWriteTime -lt $start}
        Write-host "$($WebSite.name) [$logfile]"
      }
    }
}

Then we can call it, optionally specifying the age of the log files we want to purge using the -age parameter. I incorporate the Test-Path code to ensure we’re not throwing an error for a website that is stopped and has never run. This is often the case in the aforementioned Lync/Skype for Business servers, where the default web site is disabled.

As you can see, PowerShell can be great at making sure your servers don’t get packed full of log files, while still maintaining enough logs to be helpful.

Donations

I’ve never been one to really solicit donations for my work. My offerings are created because *I* need to solve a problem, and once I do, it makes sense to offer the results of my work to the public. I mean, let’s face it: I can’t be the only one with that particular issue, right? Quite often, to my surprise, I’m asked why I don’t have a “donate” button so people can donate a few bucks. I’ve never really put much thought into it. But those inquiries are coming more often now, so I’m yielding to them. If you’d like to donate, you can send a few bucks via PayPal at https://www.paypal.me/PatRichard. Money collected from that will go to the costs of my website (hosting and domain names), as well as to my home lab.

Function: Get-UpdateInfo – Making It Easy for Your Users to Get the Latest Version of Your Scripts

October 10th, 2016 No comments

updatepromptDescription

As a PowerShell developer, you always want your users to have the latest version of a script. It makes support a lot easier, while also making sure that users have the latest features and bug fixes. But how to encourage that? Well, for me, users of my scripts are typically not within the same environment as me. So Group Policy Objects, logon scripts, etc, aren’t a solution. Having the script automatically check for an update is much easier, and doesn’t require anything from the user1. So let’s take a look at a quick and easy method.

First, we need a repository where the update information will be held. XML is perfect for this. In this example, I created the following file, and saved it as version.xml:

<?xml version="1.0"?>
<catalog>
<article id="1697">
<title>Set-CsFeatures.ps1</title>
<author>Pat Richard</author>
<version>3.9.57</version>
<publish_date>2016-10-08</publish_date>
<description>Installs all required Windows 2012/Windows 2012 R2 components & optional tools.</description>
</article>
</catalog>

This file can reside anywhere. A file path, a web site, wherever. I chose a website for the reasons I mentioned above. You can see the above file in action at https://www.ucunleashed.com/downloads/version.xml. Some key points to the file. Each article I publish going forward will have it’s own “article” node. The ID I chose to tie to it is also the ID of the article’s URL, for consistency sake. In this example, 1697 is the prereq script seen at https://www.ucunleashed.com/1697. The version value is the version of the latest general availability (“GA”) build. We’ll query that value, compare it against the version of the script running the query, and see if it’s newer. Note that there is some other info in the XML file, and that’s irrelevant to what we’re discussing here.

[xml] $xml = (New-Object System.Net.WebClient).DownloadString("https://www.ucunleashed.com/downloads/version.xml")
$Ga = ($xml.catalog.article | Where-Object {$_.id -eq $article}).version

We supply the $article value when making the call. After that, it’s a simple comparison. In the prereq script, near the beginning, I assign a variable, $version, with a value. Let’s say it’s “3.9.55”. We compare $Ga against $Version

$Ga -gt $Version

If it’s true, we know a newer version exists. If it’s false, we know the currently running script is the latest version. In theory, we could also use this to alert of a regression in case we needed to downgrade (gasp!). So let’s put this together. We assign a variable, $xml, to the results of downloading an xml file. Then, we assign $ga to the value of “version” for the specific node within the xml file that contains the info for the article. Lastly, we do our comparison and give some output if there is an update.

[xml] $xml = (New-Object System.Net.WebClient).DownloadString("https://www.ucunleashed.com/downloads/version.xml")
$Ga = ($xml.catalog.article | Where-Object {$_.id -eq $article}).version
if ($Ga -gt $Version){Write-Output "A new version is available!"}

Now, obviously, we can pretty this up a bit. But before we do that, let’s think of issues we could run into. The big one is making sure we have an Internet connection to use to check the XML file. As much as we can often assume there will be one, a LOT of organizations block Internet access to servers as part of their security posture. So we shouldn’t assume. We can check using the following:

[bool] $HasInternetAccess = ([Activator]::CreateInstance([Type]::GetTypeFromCLSID([Guid]'{DCB00C01-570F-4A9B-8D69-199FDBA5723B}')).IsConnectedToInternet)

And then using an IF loop against $HasInternetAccess. So let’s throw this all into a function we can incorporate into our scripts and modules:

function Get-UpdateInfo {
  [CmdletBinding(SupportsShouldProcess, SupportsPaging)]
  param (
    # Article/script to check for updates
    [parameter(ValueFromPipeline, ValueFromPipelineByPropertyName)]
    [string] $article
  )
  [bool] $HasInternetAccess = ([Activator]::CreateInstance([Type]::GetTypeFromCLSID([Guid]'{DCB00C01-570F-4A9B-8D69-199FDBA5723B}')).IsConnectedToInternet)
  if ($HasInternetAccess){
    [xml] $xml = (New-Object System.Net.WebClient).DownloadString("https://www.ucunleashed.com/downloads/version.xml")
    $Ga = ($xml.catalog.article | Where-Object {$_.id -eq $article}).Version    
    if ($Ga -gt $version){
      Write-Log -Level Warn -Message "Outdated version. Version $Ga is latest version. Prompting user" -NoConsole
      $wshell = New-Object -ComObject Wscript.Shell -ErrorAction Stop
      $updatePrompt = $wshell.Popup("A new version ($ga) of the script is available. Would you like to download it?",0,"A new version is available",68)
      if ($updatePrompt -eq 6){
        Start-Process "https://www.ucunleashed.com/$article"
      }
    }
  }else{
    Write-Output "No Internet connectivity. Unable to check online for update info."
  }
} # end function function Get-UpdateInfo

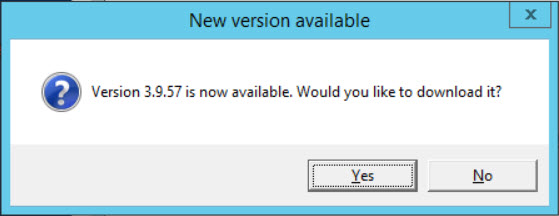
Here we incorporate a simple ComObject popup message to ask if the user wants to download the new version. Since we have assigned the GA number to $ga, we can use that in the popup text, as well, as shown in the image at the beginning of this article. If $updatePrompt is “6”, then the user clicked “Yes” on the popup, and we can take action such as opening a browser window and navigating to the articles page. Or we could download a file, or any of a number of actions. If $updatePrompt is “7”, then the user clicked “No”.

So, as you can see, it’s really not that hard to add an update checker to your scripts. When you release a new version, simply update the XML file to reflect accordingly.

Note: Take care in what kind of characters are in the XML file. Some special characters, such an ampersand (“&”), aren’t handled very well. When in doubt, open a browser window and navigate to the file.

1 – Depending on the action you require once it’s known an update is available.

Donations

I’ve never been one to really solicit donations for my work. My offerings are created because *I* need to solve a problem, and once I do, it makes sense to offer the results of my work to the public. I mean, let’s face it: I can’t be the only one with that particular issue, right? Quite often, to my surprise, I’m asked why I don’t have a “donate” button so people can donate a few bucks. I’ve never really put much thought into it. But those inquiries are coming more often now, so I’m yielding to them. If you’d like to donate, you can send a few bucks via PayPal at https://www.paypal.me/PatRichard. Money collected from that will go to the costs of my website (hosting and domain names), as well as to my home lab.

One Liner: Enabling Mapped Drives in Elevated PowerShell Sessions

July 18th, 2016 No comments

If you’ve worked with mapped drives in PowerShell sessions, you know it’s problematic to access mapped drives from an elevated PowerShell session when UAC is configured to prompt to prompt for credentials. Microsoft released a TechNet KB article on this issue quite some time ago. The article shows different ways to address the problem, from using the Local Security Policy, mapping the drives again in the elevated prompt, and using the registry. We’ll focus on the registry here for several reasons. The first is that using the local security policy seems burdensome; mapping the drives again seems redundant, and potentially confusing if the original mappings change and the ones in your PowerShell session don’t; and thirdly, and most important, we’re talking PowerShell here!

The local security policy really just changes registry settings under HKLM:\SOFTWARE\Microsoft\Windows\CurrentVersion\Policies\System, so using PowerShell to set registry settings accomplishes the same thing. We can add new property, EnableLinkedConnections using the New-ItemProperty cmdlet, which also lets us set its value to 1. A value of 1 will enable the mapped drives in elevated session, while a value of 0, or completely removing the property, disables those mapped drives in an elevated session. So let’s implement this:

New-ItemProperty -Path 'HKLM:\SOFTWARE\Microsoft\Windows\CurrentVersion\Policies\System' -Name EnableLinkedConnections -Value 1 -PropertyType 'DWord'

Now, if you want to put this in your PowerShell profile, then it will get processed every time. The problem is that you’ll get a “The property already exists” exception error every time it runs after the first time. So, we just wrap it in an IF statement using Get-ItemProperty, checking to see if it exists first. If not, create the item property.

if (-not (Get-ItemProperty -Path 'HKLM:\SOFTWARE\Microsoft\Windows\CurrentVersion\Policies\System' -Name EnableLinkedConnections)){
  $null = New-ItemProperty -Path 'HKLM:\SOFTWARE\Microsoft\Windows\CurrentVersion\Policies\System' -Name EnableLinkedConnections -Value 1 -PropertyType 'DWord'
}

Why would we want to include this in our profile? Because when we get new machines, or reload an existing machine, we don’t want to have to go back and manually configure everything again. We can just manually run the profile script and have it configure everything for us.

Categories: PowerShell Tags: , ,

Easily Configuring Your PowerShell Profile on Multiple Machines

July 15th, 2016 No comments

Description

I mentioned in One Liner: Enable Windows Explorer Preview of PowerShell Files that I use the same PowerShell profile script on all of my machines, courtesy of OneDrive. I wanted to show a couple of lines that are at the top of my profile that make this even easier. When I reload a computer, or get a new one, I need to configure that machine to use the shared profile. This is super easy. The profile .ps1 file is just dot sourced. So the file resides in my OneDrive hierarchy. I merely wait for OneDrive to finish its initial sync, and then open an elevated PowerShell session and run the shared file. At the top of the file is the following code:

if (-not (Test-Path $profile)){
	New-Item -Path $profile -Type file -Force
	$MyName = $MyInvocation.MyCommand.Definition
	Add-Content -Path $profile -value ". `".\$MyName`""
}

For information on the various files that can be used for a PowerShell profile, see Windows PowerShell Profiles. Since, by default, no profile exists, the top line in the code above, which verifies that a profile does not exist, passes. The next line creates the empty file. The third line gets the path and name of script file running (the one in OneDrive), and the fourth line adds that path as a dot source to the newly created profile. So, when you look in the newly created profile file, It has a single line:

. "d:\OneDrive\PowerShell\profile\profile.ps1"

So, when PowerShell is opened, and the profile is evaluated, the dot sourced file is loaded. Easy peasy! And, since it’s in OneDrive, all of the hard work you put into your profile is safe and secure in the event of a computer problem. But more importantly, when working from a different machine, you still have the same experience.

Feel free to comment below, including ideas, suggestions, and code sample for things you’ve done, or would like to see.

Donations

I’ve never been one to really solicit donations for my work. My offerings are created because *I* need to solve a problem, and once I do, it makes sense to offer the results of my work to the public. I mean, let’s face it: I can’t be the only one with that particular issue, right? Quite often, to my surprise, I’m asked why I don’t have a “donate” button so people can donate a few bucks. I’ve never really put much thought into it. But those inquiries are coming more often now, so I’m yielding to them. If you’d like to donate, you can send a few bucks via PayPal at https://www.paypal.me/PatRichard. Money collected from that will go to the costs of my website (hosting and domain names), as well as to my home lab.


Categories: PowerShell Tags:

One Liner: Enable Windows Explorer preview of PowerShell Files

July 14th, 2016 No comments

I really like the Preview Pane in Windows Explorer. It saves me from having to open files in their default app. The problem is that PowerShell files are not visible in Windows Explorer by default. And if you’re like me, you probably often look for code snippets in your .ps1 files. That’s pretty easy to fix, however, with a single line entered in an elevated PowerShell session utilizing the Set-ItemProperty cmdlet:

Set-ItemProperty Registry::HKEY_CLASSES_ROOT\.ps1 -Name PerceivedType -Value text

What this does is tell Windows Explorer to treat .ps1 files as text.

What I’ve done is add that in my PowerShell profile. My PowerShell profile is stored on OneDrive, and every machine I have references that same profile file. So, no matter what machine I’m on, I get the same experience, including the preview of PowerShell files. However, you must run it in an elevated session. So in my profile, to prevent errors, I check to see if the session is elevated, and if it is, set the property. It’s easy with:

if ((New-Object Security.Principal.WindowsPrincipal $([Security.Principal.WindowsIdentity]::GetCurrent())).IsInRole([Security.Principal.WindowsBuiltinRole]::Administrator)) {
  Set-ItemProperty Registry::HKEY_CLASSES_ROOT\.ps1 -Name PerceivedType -Value text
}

Now some of you will quickly note that only .ps1 files are included in my example. But PowerShell can also include .psm1 and .psd1 files as well. Can we still accomplish handing all three extensions in a single line of code? Absolutely. We can use Get-Item with the Include parameter to retrieve info for all three extensions, and then pipe that to Set-ItemProperty. Here’s an example:

Get-Item Registry::HKEY_CLASSES_ROOT\* -Include .ps1,.psd1,.psm1 | Set-ItemProperty -Name PerceivedType -Value text

And of course we can wrap this with the previously mentioned elevated check:

if ((New-Object Security.Principal.WindowsPrincipal $([Security.Principal.WindowsIdentity]::GetCurrent())).IsInRole([Security.Principal.WindowsBuiltinRole]::Administrator)) {
  Get-Item Registry::HKEY_CLASSES_ROOT\* -Include .ps1,.psd1,.psm1 | Set-ItemProperty -Name PerceivedType -Value text
}

I’ll be writing about more things in my PowerShell profile in the coming weeks. I welcome comments and suggestions, including things you include in your profile to help your productivity.

Categories: PowerShell Tags:

Script: Install-OfficeWebAppsLanguagePacks.ps1 – Easier Installation of Selected Language Packs

March 7th, 2015 No comments

PowerShell-logo-128x84Description

I was working with a global customer lately who has datacenters in various global regions (as most global orgs do). The customer had not decided, and basically, hadn’t even thought about what language packs to install on their Office Web Apps Servers (OWAS). I suggested that there are 49 language packs including the English pack that I install by default on every OWAS server. Those languages are:

Azeri (Latin)
Basque
Bosnian (Latin)
Bulgarian
Catalan
Chinese (Simplified)
Chinese (Traditional)
Croatian
Czech
Danish
Dari
Dutch
English
Estonian
Finnish
French
Galician
German
Greek
Hebrew
Hindi
Hungarian
Indonesian
Irish – Ireland
Italian
Japanese
Kazakh
Korean
Latvian
Lithuanian
Macedonian (FYROM)
Malay (Malaysia)
Norwegian (Bokmal)
Polish
Portuguese (Brazil)
Portuguese (Portugal)
Romanian
Russian
Serbian (Cyrillic)
Serbian (Latin)
Slovak
Slovenian
Spanish
Swedish
Thai
Turkish
Ukranian
Vietnamese
Welsh

The customer decided on which language packs to install.

If you’ve ever tried to install these, you know you go to the language pack download page, and pick your desired language. When the next page comes up, you notice that it’s in the language of the desired language pack. You hope you’re clicking on the right link, download the file, then run the installer, which is mostly in the desired language, and go from there. It can be somewhat confusing, but extremely repetitive – especially if you’re installing a lot of language packs. It got me thinking that this was an area ripe for automation (what area isn’t?).

Well, as I’ve mentioned on this blog before, I’m lazy (as most coders are). So I wrote this script to make my life easier, and as a result, you gain from it. Here’s what the script does:

  1. Detects which (if any) language packs are installed on the local machines. This is accomplished by looking for the correct GUID in the Uninstall branch of the registry.
  2. Displays a grid list of the language packs that are available and not already installed on the machine (see image below). You can select one or more language packs to install and click “Ok”.
  3. The script will download the language pack(s)
  4. It will mount (if they are an .img file), or extract (if an .exe).
  5. It will silently install the language pack
  6. It will clean up after itself (unmount or clean up extracted files)

Here is the selection list presented. Notice that English is not in the list as that language pack is already installed.

OWAS language pack selection

Once installation is completed, you’re left with your language packs installed and a nice little log file.

OWAS post installation

Extract the files to any folder. The script and the .csv file MUST be in the same folder. Run it by calling Install-OWASLanguagePack.ps1 and it will default to using the following path structure (which it will create if it doesn’t already exist):

Path Purpose 
c:\_Install Root working folder. Can be changed using -TargetFolder when calling the script.
c:\_Install\logs Log files from the script are stored here
c:\_Install\OWASLanguagePacks Downloaded language pack files are stored here. Folder name can be changed using -OWASLanguagePackFolder. Language packs are placed in sub folders of this folder. The sub folders match the language of the language pack.

A little bit of a rant. I *REALLY* wish the language packs were an MSI file that supported silent install instead of an .img file that must be mounted or an .exe that must be extracted, and then each called with complex syntax.

Syntax

Install-OWASLanguagePacks.ps1 [[-TargetFolder]][[-OWASLanguagePackFolder]] [-WhatIf] [-Confirm] [-IncludeTotalCount] [-Skip] [-First][<commonparameters>]

Installation

Execution Policy: Third-party PowerShell scripts may require that the PowerShell Execution Policy be set to either AllSigned, RemoteSigned, or Unrestricted. The default is Restricted, which prevents scripts – even code signed scripts – from running. For more information about setting your Execution Policy, see Using the Set-ExecutionPolicy Cmdlet.

Donations

I’ve never been one to really solicit donations for my work. My offerings are created because *I* need to solve a problem, and once I do, it makes sense to offer the results of my work to the public. I mean, let’s face it: I can’t be the only one with that particular issue, right? Quite often, to my surprise, I’m asked why I don’t have a “donate” button so people can donate a few bucks. I’ve never really put much thought into it. But those inquiries are coming more often now, so I’m yielding to them. If you’d like to donate, you can send a few bucks via PayPal at https://www.paypal.me/PatRichard. Money collected from that will go to the costs of my website (hosting and domain names), as well as to my home lab.

Assumptions

None

Download

v1.0 – 03-07-2015 – Install-OWASLanguagePacks.v1.0.zip

Changelog

See the changelog for information on what’s changed/included in each version.